Another Halloween has all but arrived! Whether hosting your own ghoulish gathering, or just planning to attend one, these DIY edibles and décor ideas are easy, inexpensive and fun to create. Heck, scare the fam into joining in! 😉
For more Halloween treat ideas from craft enthusiast Adeina Anderson, visit Crafting With Adeina!
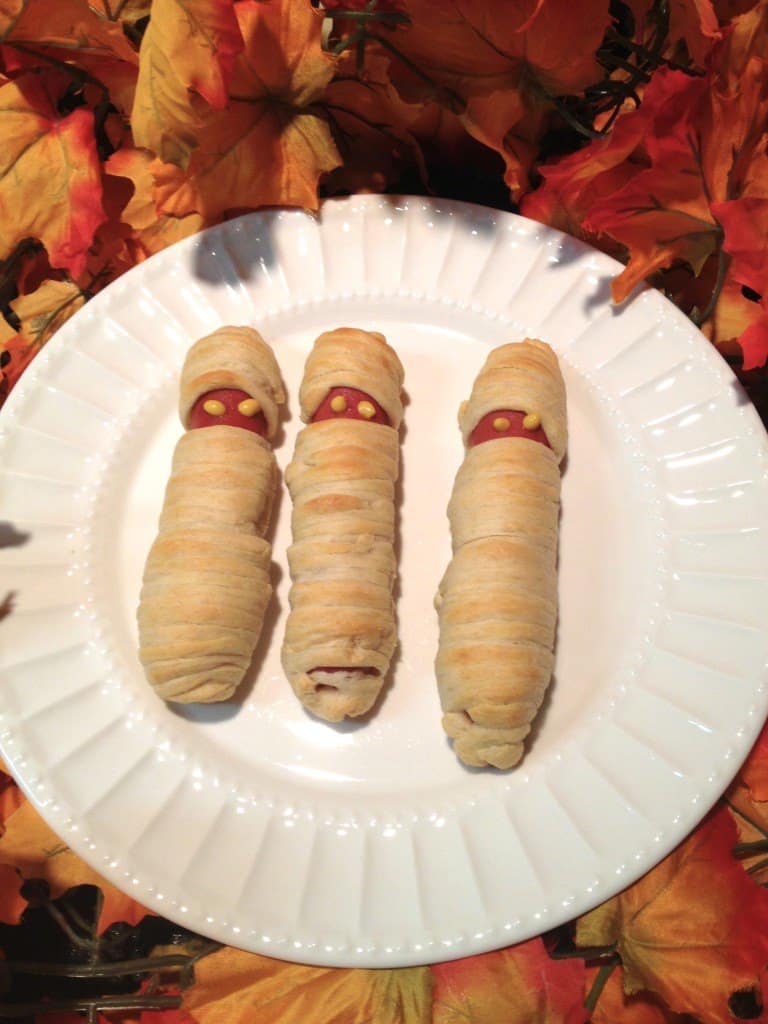
Mummy Yummies:
- 1 package of hot dogs
- 1 can of refrigerator crescent rolls
- Mustard
Preheat your oven to 375. Open the can of crescent rolls and lay them out flat on a cookie sheet. Use a butter knife to cut them into 1/8” strips.
Next, wrap your hotdogs with the strips of crescent rolls. Be sure to cover the hot dog completely with one layer of strips, leaving a ½ inch opening close to the top of the hot dog for the face.
Lay the covered hot dogs onto the cookie sheet and bake them for 12-14 minutes. Once the “mummies” are cooled, use the mustard to draw eyes on the exposed part of the hot dog. Serve warm and enjoy.
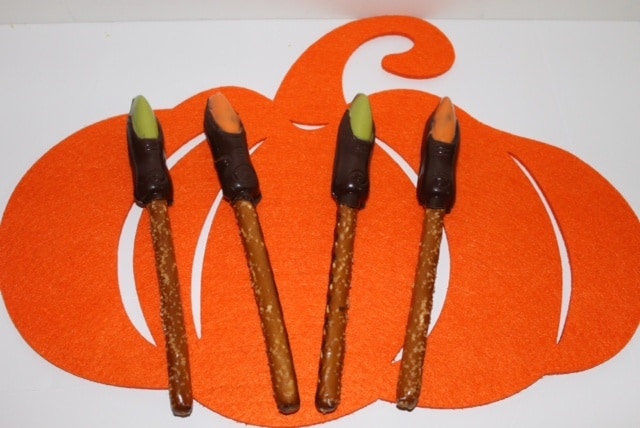
Witch Fingers:
- Snyders pretzel rods
- Wilton melting pot
- Wilton candy melts (your choice of colors)
- Wilton decorating bags
- Wilton witch finger pretzel mold
- Butter knife
Create this using the Wilton melting pot or you can melt the candy melts in your microwave – just follow the instructions on the bag.
To get started, melt the color of Candy Melts that you would like to fill the mold. Use one color of melts for the fingernail and another color for the finger. Add a little bit of the melted Candy Melts into the fingernail part of the mold, then fill half of the remaining mold with another color.
Place the pretzel rod into the mold and fill the remainder of the mold with more melted candy. Scrape the top of the mold with a butter knife to smooth it out.
Place the filled mold into the refrigerator for one hour to harden. The hardened treat should just pop out of the mold very easily. As always, remember to get creative and have fun enjoying this yummy haunted treat.
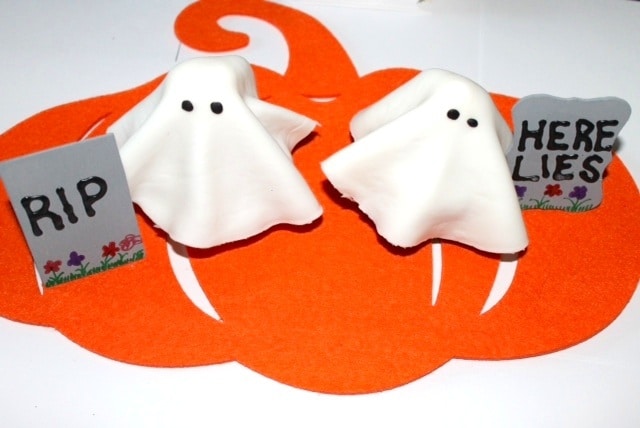
Ghostly Cupcakes:
- Undecorated Cupcakes
- Brownie bites
- Wilton Decorator Preferred Fondant in white and black
- Wilton White Icing Pouch
- Rolling Pin
- Toothpicks or lollypop sticks
Place the brownie bites onto a toothpick or lollypop stick. Using the white icing pouch, cover the top of the brownie bite and the top of the cupcake. Place the other end of the toothpick or lollypop stick into the cupcake and place them in the refrigerator for about an hour.
While the icing is hardening a bit, start to roll out your white fondant. Form it into a ball and then roll it until thin, but still easy to pick up off the counter or cutting board. Roll the fondant into an 8-10 inch round circle. Place the rolled fondant onto the cooled cupcake/brownie bite and push it in just enough to make it look like a ghost, You may need to cut a little bit off of the ends of the fondant.
Now roll out the black fondant and cut a mouth and eyes to place on the head of the ghost.
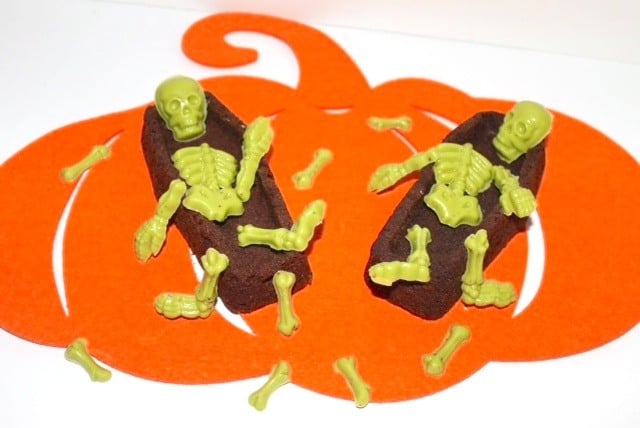
Skeleton Brownies:
(can be found in most craft and grocery stores)…
- Coffin brownie mold
- Skeleton candy mold
- Candy melts (Here: Caramel Apple flavored)
- Melting pot
- Cake decorating bags
- Duncan Hines Brownie Mix
Follow the instructions on the brownie box for mixing up the brownies. Pour the brownie mixture into the greased coffin mold. Bake using the instructions on the coffin package. While the brownies are baking, start melting your candy melts. Place the melted candy into a cake decorating bag and cut the tip off.
Now carefully drizzle the melted candy into the skeleton mold and level it out by tapping it on the counter. Next, place it in the fridge for about 20 minutes. After the brownies and candies have cooled, start putting the bones into the brownie for decoration.
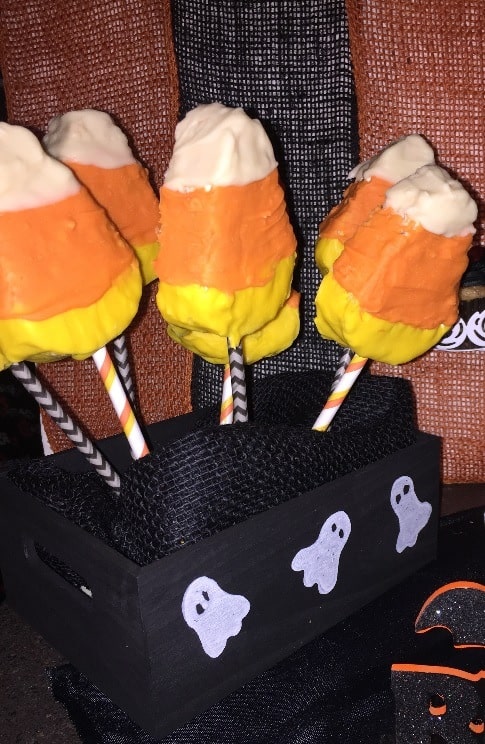
Rice Krispy Candy Corns on a Stick:
- 8 cups of Rice Krispies
- 2-7 oz jars of Jet Puffed Marshmallow Creme
- 4 Tablespoons of butter (use real butter, not margarine)
- Pam Cooking Spray
- Large cooking pot
- 12 x 18 baking pan
- Saran wrap
Wilton Items Needed:
- Candy Corn Cookie Cutter
- Candy melts in orange, yellow and white
- Lollipop sticks
- Melting Pot
First, spray baking pan with Pam, and set aside. Next, place the butter in large pot and melt over medium heat, add marshmallow crème and mix continuously.
Once it is completely mixed, remove from heat so it doesn’t burn and add the rice krispies, 2 cups at a time. Press the mixture into the sprayed baking pan. Be sure to press the mixture down very firmly. Cover with saran wrap and place in the refrigerator for a couple of hours.
Take the baking pan out of the refrigerator and tip over onto parchment paper. Use the cookie cutter to cut out the candy corn shapes, or other Halloween shapes.
Place the shapes onto a cookie sheet keeping them on the parchment paper and put them back into the refrigerator for an hour. Before you remove the Krispy treat candy corns from the refrigerator, melt the Wilton candy melts either in the microwave (follow instructions on package), or in the melting pot. Start with the yellow and dip the bottom of the treat into the melted candy. Then add a little of the melted candy to the tip of a lollipop stick and place it into the bottom of the Krispy treat.
Let it cool in the refrigerator for at least 20 minutes, then melt the orange candy melts and dip the remaining Krispy treat into the orange. Let cool for 20 minutes.
Lastly, melt the white candy melts and dip the tip of the Krispy treat into that. Let them cool completely in the refrigerator for about an hour. For an added look, sprinkle some Wilton Halloween sprinkles onto the candy corn as you add the melted candy melts.
For the Home…
Sprucing up your home this holiday season doesn’t have to break the bank or take up to much of your time! All you need are a few items from the craft store, as well as a couple of things I’ll bet you already have around the house…
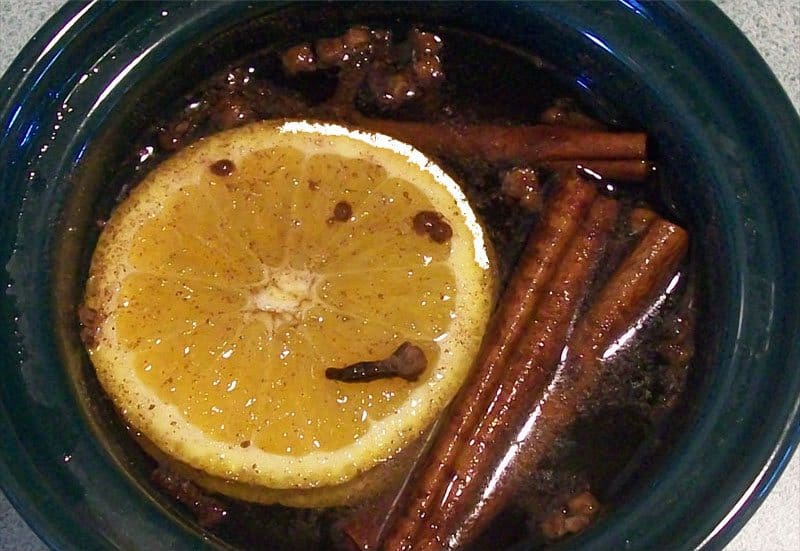
Cast a spell over your entire household with this aromatic Witches Brew [above], courtesy of Rachael’s Favorite Recipes!
- 1 apple
- 1 orange
- 1 lemon
- 2 T whole allspice
- 2 T whole cloves
- 4 cinnamon sticks
Slice fruit into rings. Don’t worry about peels, seed, cores, etc. Place all ingrdients into a crock-pot. Fill with water. Simmer on low. Refill with water as needed. Be careful not let the water get too low!
Pumpkin Décor:
Watch my short video above with Adeina for pumpkin centerpieces you can make in a snap. Dust’em with glitter, load’em with lollipops–there’s lots you can do!
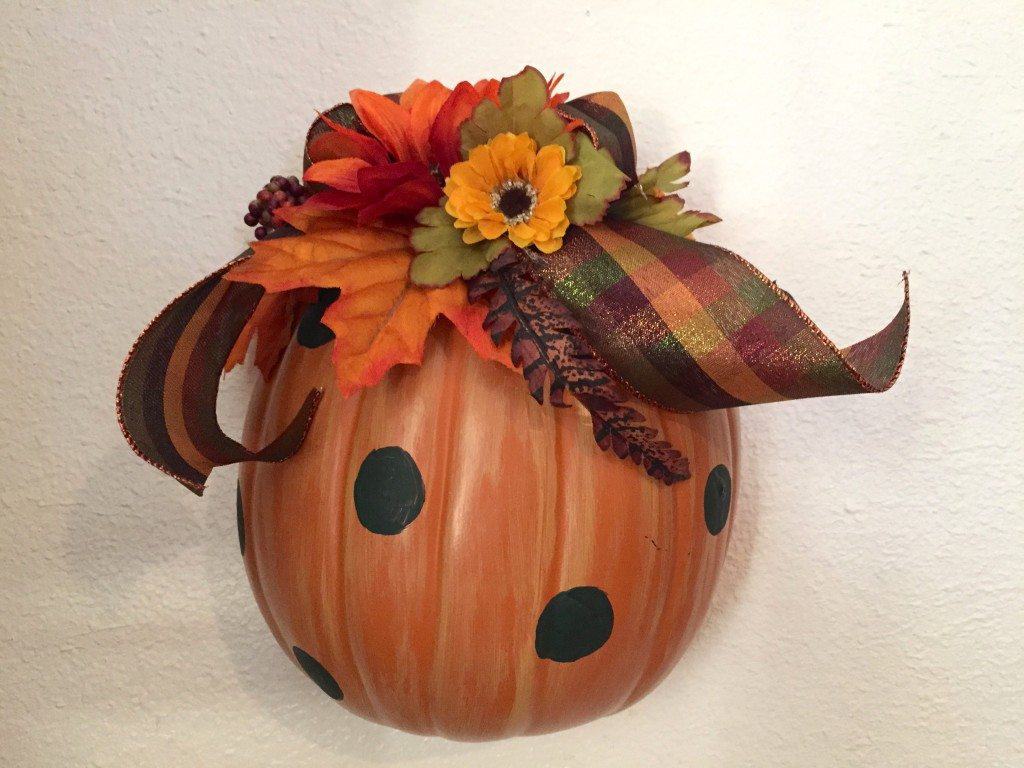
Pumpkin Wall Hanger
- Half size craft pumpkin
- Americana acrylic paint – Forest Green
- Americana Multi Surface paint – Gold
- Sponge Brushes
- Fall ribbon (wired works best)
- Fall floral
- Hot glue gun
Using the sponge brush, lightly paint streaks with the gold paint onto the pumpkin, do not cover the whole pumpkin with the paint, just lightly streak it. Let the paint dry at least 10 minutes.
Using a clean sponge brush, dip just the tip of the brush into the green paint and twist a circle onto the pumpkin to make a polk-a-dot. Repeat this process until there are 8 – 10 polk-a-dots on the pumpkin. Let the dots dry completely, 10 – 20 minutes.
Create a bow with the fall ribbon, either a shoelace bow or create a looped bow with 2 – 3 loops on each side. Hot glue the bow to the top of the pumpkin. Then, pull some of the fall flowers off of the bush and hot glue them onto the top of the pumpkin with the bow. Let everything dry completely and then hang it where you would like.
Table Setting:
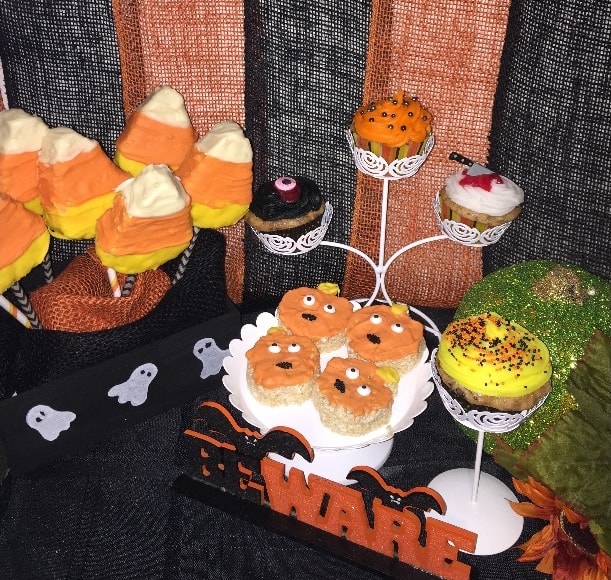
Layering is the key. Start with some colorful plates and cups – you can stack the plates on top of the cups. Find cute cupcake holders, like Adeina’s shown above, at your local craft store. Add a few decorated pumpkins and some Halloween décor, and you’ll have a haunting Halloween display in no time!
For more delicious recipes and fun food and wine pairing ideas, subscribe to my newsletter.









Leave a Reply